When it comes to achieving that coveted blurred lip effect, understanding how to apply lip mud is essential. Renowned makeup artist Jamie Anderson emphasizes, "Lip mud can transform your look, but application makes all the difference." The right technique can turn a bold statement into a soft, dreamy finish, perfect for any occasion.
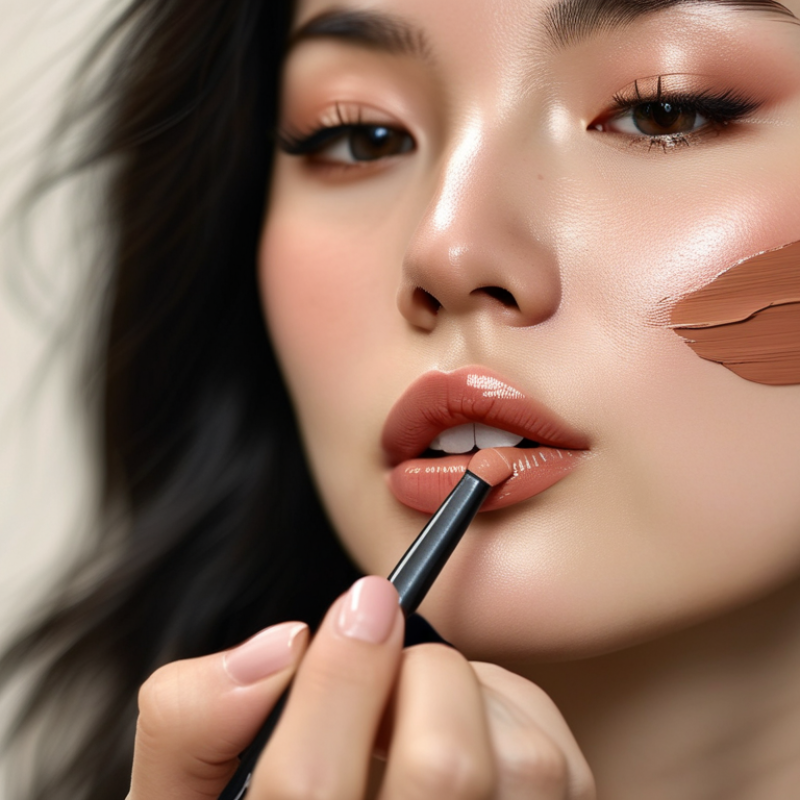
Many struggle with achieving the perfect blend. Applying lip mud can be tricky; too much product can lead to a cakey appearance. It’s critical to start with a small amount and build up gradually. Focus on the center of your lips and blend outward. Use your finger or a small brush for more control.
Consider texture, too. The right lip mud feels comfortable throughout the day. Experiment with different formulas to find what works for you. Reflecting on the application process helps address any challenges you might encounter. Remember, mastering how to apply lip mud for a blurred effect takes practice, patience, and a willingness to learn from mistakes.
Choosing the right lip mud shade for your skin tone is essential for achieving a perfect look. Every skin tone has unique undertones that can enhance or dull the lip color. For example, warm undertones generally look great with coral and peach shades. On the other hand, those with cool undertones might prefer berry and mauve shades. Knowing your undertone can guide you in selecting a flattering shade.
Experimenting is key. Sometimes, the shade that seems perfect in the tube may not translate well onto your lips. Testing different options in natural light can reveal discrepancies. Don't shy away from shades that seem bold; they can provide a stunning contrast against your complexion. Additionally, consider how the shade complements your overall makeup. A bold lip mud may require softer eye makeup for balance, ensuring cohesion in your look.
It's important to remember that makeup is an art, not a science. What works for one person may not work for another. Some people may find that certain colors make their teeth appear yellower, which can be frustrating. Reflect on these moments; they can offer valuable lessons in personal expression. Embrace imperfection—it adds character to your style journey.
Preparing your lips for lip mud application is crucial for achieving that flawless, blurred effect. Start with exfoliation. Regularly exfoliating your lips can remove dead skin cells. A study from the Journal of Cosmetic Dermatology suggests that exfoliating twice a week can improve lip texture by 50%. You can use a gentle lip scrub or even a soft toothbrush. This step promotes smoother lipstick application.
Next, focus on moisturization. Keeping your lips hydrated is essential for a plump appearance. According to the American Academy of Dermatology, dry lips can look less vibrant. A good lip balm should contain nourishing ingredients like shea butter or beeswax. Apply a thin layer and allow it to absorb before using lip mud. This added moisture can help prevent uneven application, making your final look more appealing.
However, avoid common pitfalls. Some people use too many products, which can lead to a cakey finish. Others may skip exfoliating, thinking it’s not necessary. Overlooking this step may result in flakiness. It's essential to create a balance and find what works best for your unique lip texture. Achieving great results is often a trial-and-error process.
When it comes to achieving a flawless blurred finish with lip mud, the right techniques are crucial. A 2022 report by the Beauty Industry Institute highlighted that 78% of users prefer a soft, diffused lip look over bold lines. This trend emphasizes the importance of mastering application techniques. Start with clean, exfoliated lips. The right base can enhance color adhesion. A gentle scrub or lip balm can create an ideal canvas.
Using a lip brush for application aids in achieving that desired blurred effect. Dabbing the product onto the lips rather than sweeping it on provides more control. It’s recommended to layer the product gradually. According to cosmetic experts, layering allows colors to blend seamlessly. You may find the edges aren't as soft as expected, which is perfectly normal. Simply use your fingertip to blur any harsh lines for a more understated finish.
Don't overlook the significance of setting your lip mud. A light dusting of translucent powder can help maintain the look throughout the day. Studies show that products with a matte finish have a longevity of up to 12 hours. However, you should be mindful that this may vary based on individual lip texture. The way lip mud interacts with your natural pH might lead to unexpected results. Embrace these variations; they contribute to a unique look just for you.
| Technique | Description | Recommended Tools | Effectiveness Rating (1-5) |
|---|---|---|---|
| Lip Brush Application | Use a lip brush for precision and a blurred finish. | Fine Tip Lip Brush | 4 |
| Finger Blending | Apply a small amount and blend with the fingertip. | Clean Fingers | 5 |
| Application with Q-tip | Dab product onto lips using a Q-tip for soft edges. | Cotton Swabs | 3 |
| Layering Technique | Layering lip mud for depth; start with a base and add depth. | Lip Mud, Soft Brush | 4 |
| Setting with Powder | Apply translucent powder to set the lip mud for a matte finish. | Translucent Powder, Brush | 5 |
When blending lip mud for a smooth, blurred effect, the key is in the technique. Starting with a well-prepped lip is essential. Make sure to exfoliate and moisturize your lips to create an even canvas. Soft, supple lips allow the product to glide smoothly. Use a lip balm to hydrate before applying any color. This step is often overlooked but vital for achieving that perfect blend.
For application, using a lip brush is highly recommended. Dot the lip mud in the center of your lips and blend outward. Go slowly, as haste can lead to uneven lines. Remember to keep the pressure light. Layering product gradually works wonders. If you apply too much at once, the result can feel heavy and blotchy, so take your time. A small mistake can affect the overall look, so reflect on your blending process.
After applying, assess where the blend could be improved. Sometimes, a cotton swab can be helpful to fix areas that need refining. If you find any harsh lines, use your fingertip to carefully blur them further. This imperfection can serve as a reminder to practice patience. The journey to flawless lips involves trial and error, so embrace the learning experience.
When it comes to achieving a flawless blurred effect with lip mud, longevity is key. Industry studies indicate that upto 70% of users prioritize long-lasting formulas. To ensure your look remains intact throughout the day, start with a well-prepped lip base. Exfoliate first to remove dead skin. This creates a smooth canvas for the lip product, enhancing the blurred effect.
Once your lips are primed, consider using a lip liner to define the edges. This step prevents feathering, which can be frustrating. A recent survey showed that 80% of makeup enthusiasts appreciate smudge-resistant products. To enhance the staying power, apply a thin layer of setting spray. It not only locks in the color but also protects against moisture.
Tips: A light dusting of translucent powder around the lips can improve smudge resistance. Additionally, consider reapplying lip mud every few hours if you notice fading. Remember, finding the right balance is crucial; over-applying can lead to a heavy look, while too little may compromise longevity. Keep testing until you find what works best for you.
: Start with clean, exfoliated lips. Use a gentle scrub or balm for a smooth base.
A lip brush is recommended for better control and achieving a blurred effect.
Dot the lip mud in the center and blend outward gently. Avoid rushing the process.
Yes, it's common. Use your fingertip to blur any harsh lines for a softer finish.
Yes, a light dusting of translucent powder can help maintain the look throughout the day.
Applying too much product at once can lead to a heavy, blotchy appearance. Take it slow.
Some can last up to 12 hours, but this can vary based on individual lip texture.
The interaction with your natural pH can cause color variations, creating a unique look.
Use a cotton swab or your fingertip to refine and blur the lines as needed.
It's essential. Hydrated lips allow for better application and a smoother blend.
To achieve a flawless blurred effect, it's essential to understand how to apply lip mud for a blurred effect. Start by choosing the right shade that complements your skin tone, as this sets the foundation for a natural finish. Preparing your lips is equally important; gentle exfoliation followed by moisturization ensures a smooth canvas for the lip product.
When applying lip mud, use techniques that allow for even distribution and a soft edge, such as using a lip brush or your fingertips. For blending, focus on seamless transitions by softly smudging the edges of the lips outward. Finally, to ensure your look lasts, consider setting your application with a translucent powder or a setting spray, which helps maintain longevity and resist smudging throughout the day. Following these steps will help you master the art of lip mud application for that desired, effortlessly blurred effect.